How to make Edible Fabric from Printed Wafer
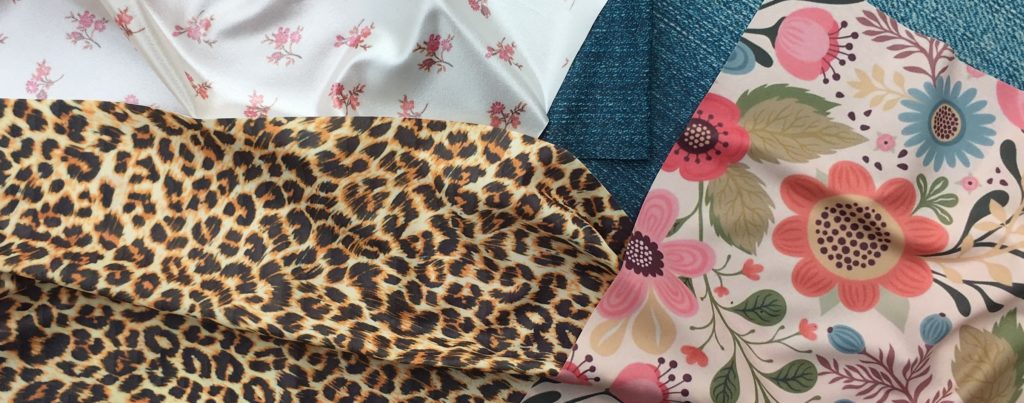
In this post we explain how to make your own edible fabric, edible silk or food safe denim. Achieve the look and feel of cloth using printed wafer paper and cheap supermarket ingredients costing around £2 to £3. The only tools and equipment you need are probably already in your kitchen. Create a stretchy, pliable, food-safe material to use as cake decorations.
There are different methods and ingredients and we’ve tried to provide as much information as possible. Whether you are a novice or a skilled cake decorator, you can choose the recipe that suits you best.
Getting Started
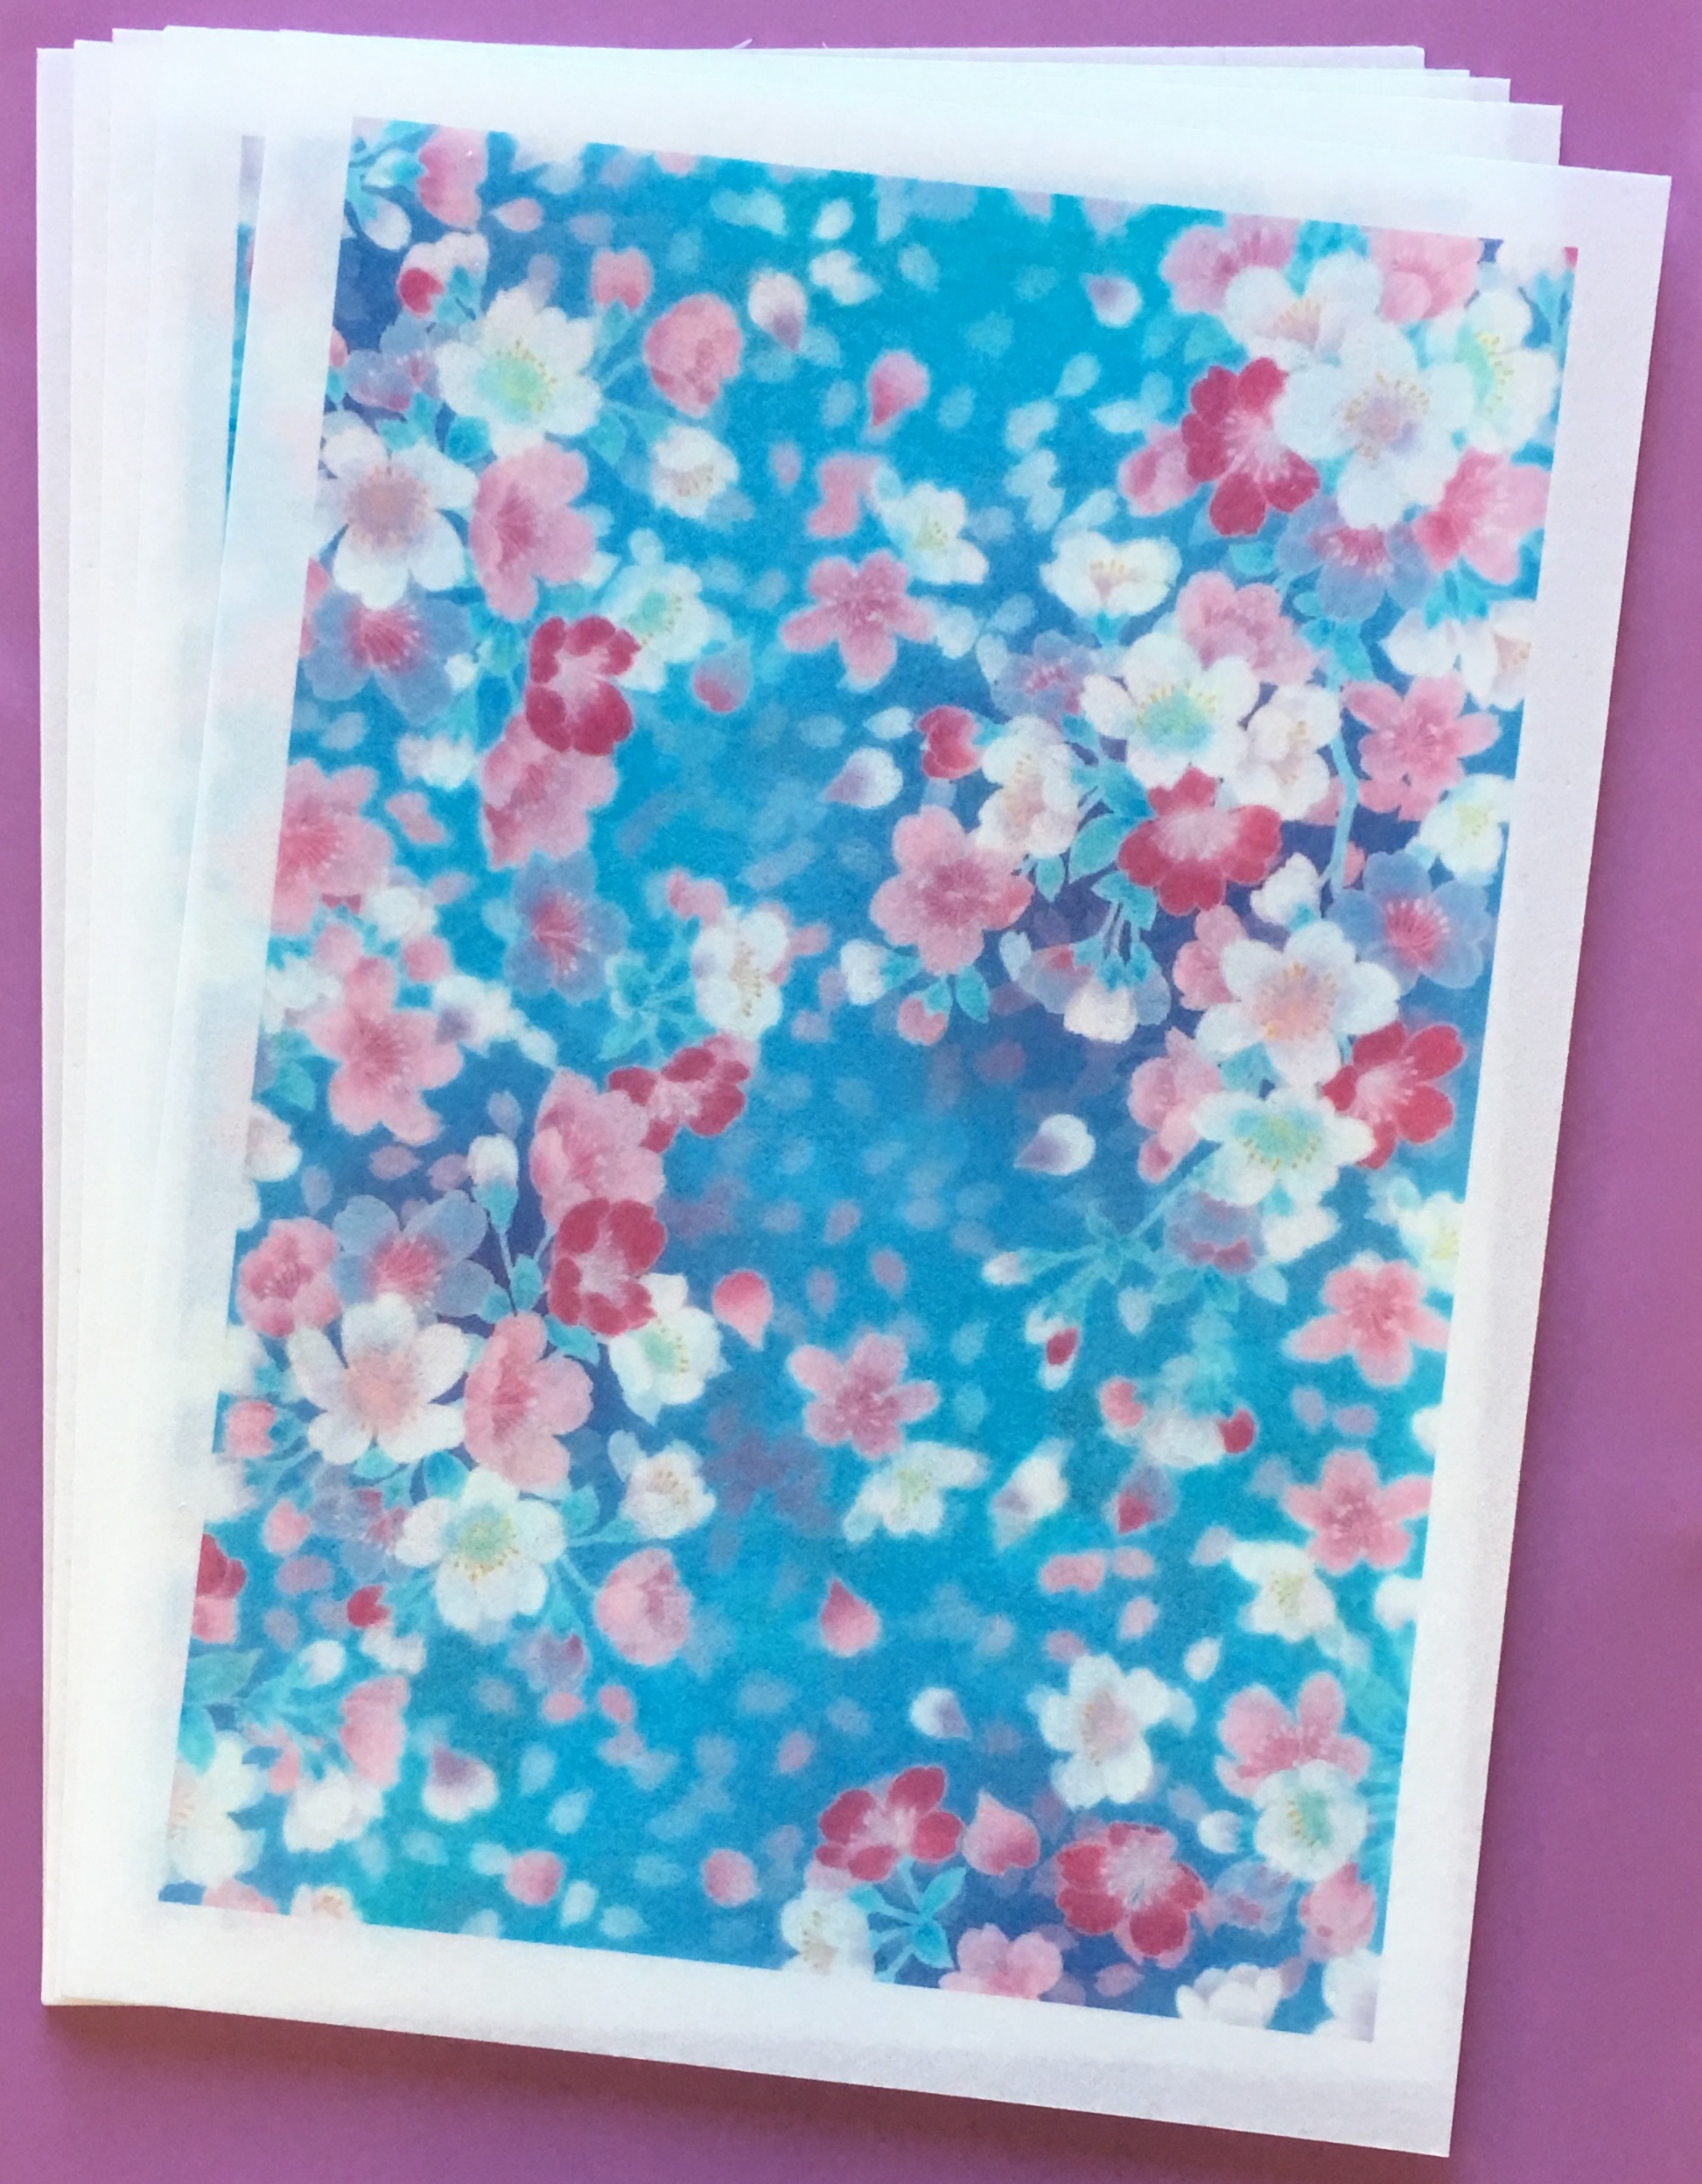
You will need Caketoppers printed wafer sheets which are custom printed with your design. Our recipes work very well with our wafer sheets as we have done extensive testing to provide the right type of wafer paper, printing method and edible ink. Feel free to use any other wafer sheets, but you may need to tweak the recipe slightly to get the results you want as they come in different grades and thicknesses.
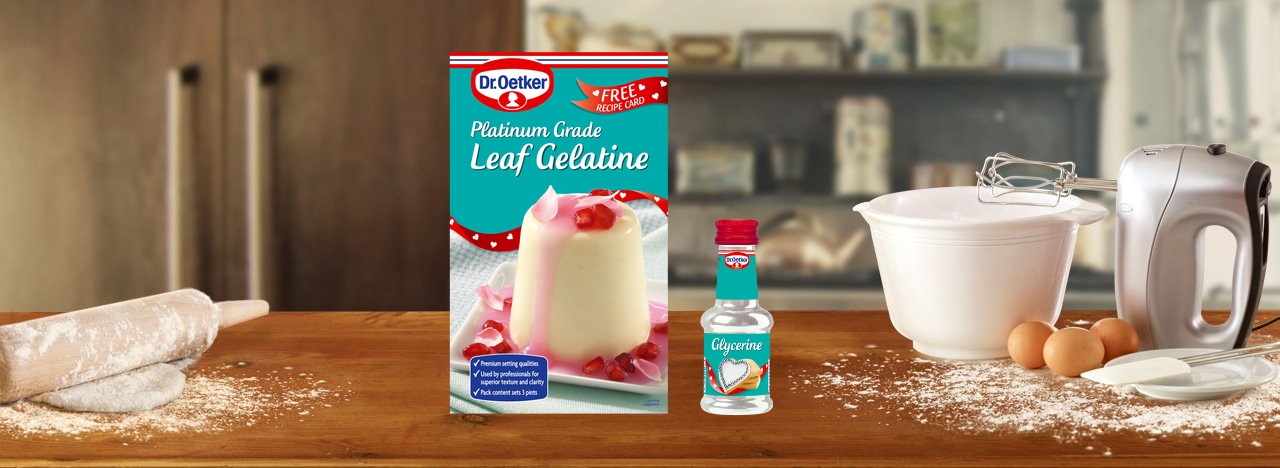
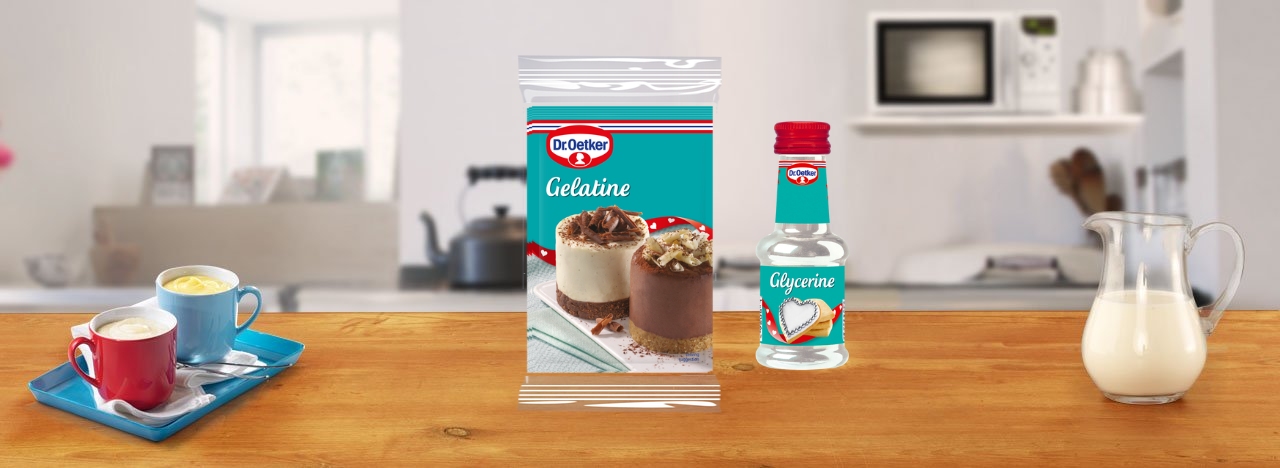
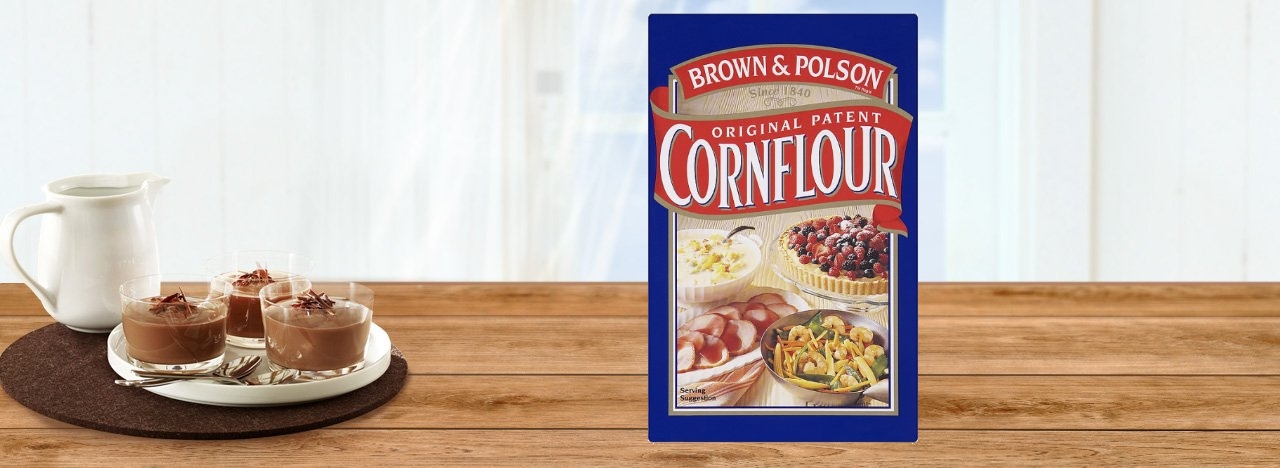
You will also need gelatine (powder or leaves) and glycerine. To create a matt finish either cornflour or food safe dusting powder are also needed.
In a nutshell, you heat up gelatine in water and mix in glycerine then paint the mixture on the wafer sheet. Full instructions are included on this page. Just read on, or jump to one of the following sections on this page:
Edible Fabric Recipe 1 uses leaf gelatine, readily available in all the major supermarkets. This gives a better result than Recipe 2, but costs a little more and is a bit more involved.
Edible Fabric Recipe 2 uses powder gelatine and is very easy. The results can vary but it’s an economical and simple way to produce amazing results.
The third recipe explains how you use your chosen mixture and finish your creation.
Use the links above or scroll down this page to see the recipes and instructions in detail.
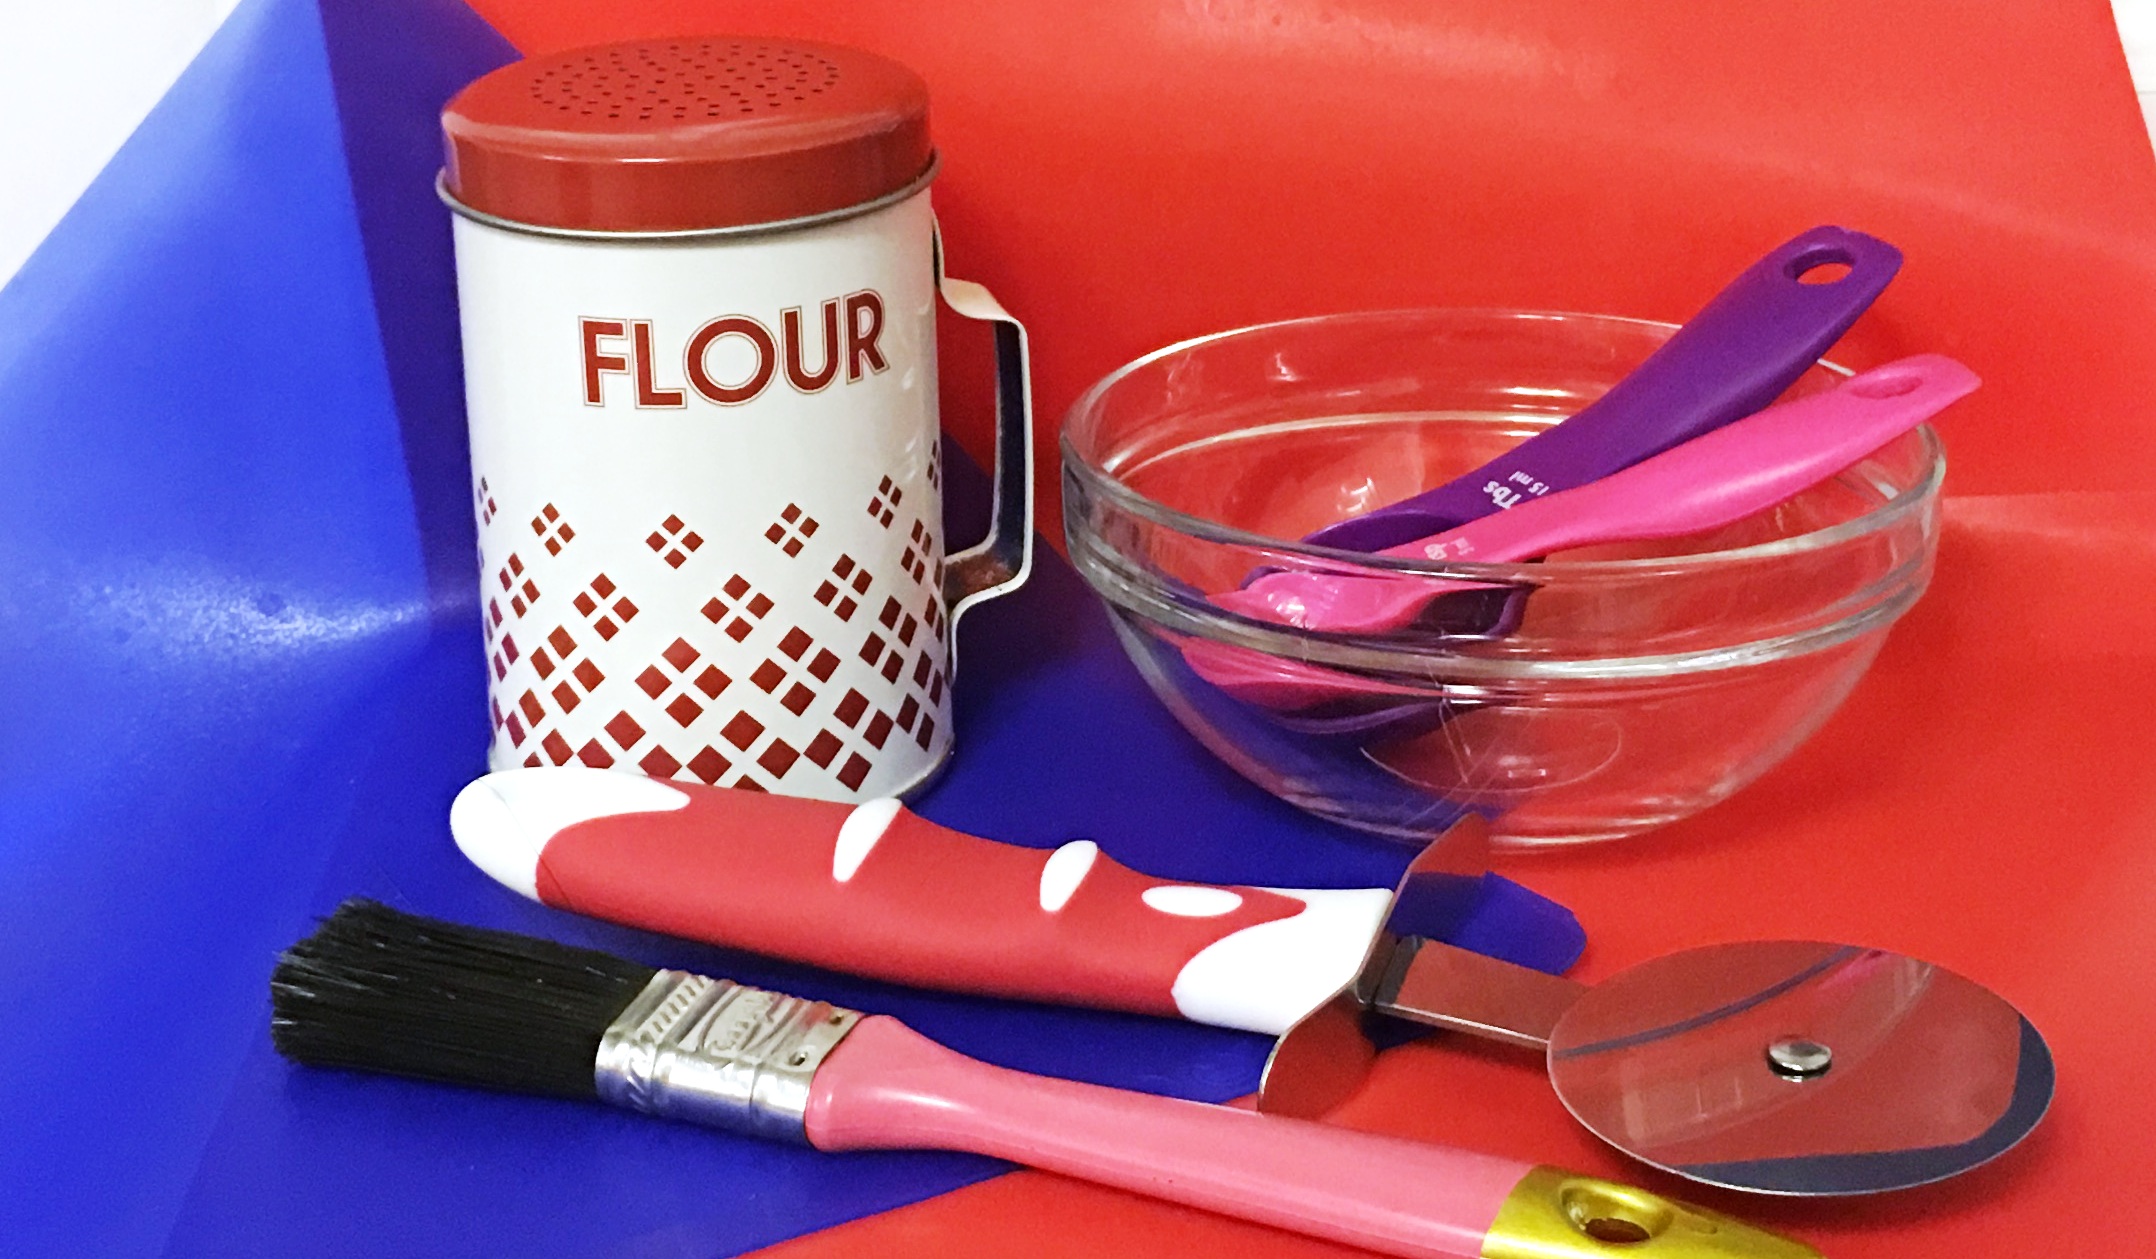
Equipment you might need
You don’t need a load of specialist equipment, just a few simple things you probably already have in your kitchen. Here’s a summary followed by some more details and alternatives.
- silicone mat, ideally two mats
- heatproof container
- measuring spoons (or a tablespoon)
- microwave (or saucepan and hob or double boiler)
- paint brushes and/or pastry brushes
- pizza cutter or craft knife
- teaspoons for mixing
- dredger, sifter, duster, tea strainer or seive
Silicone Mats
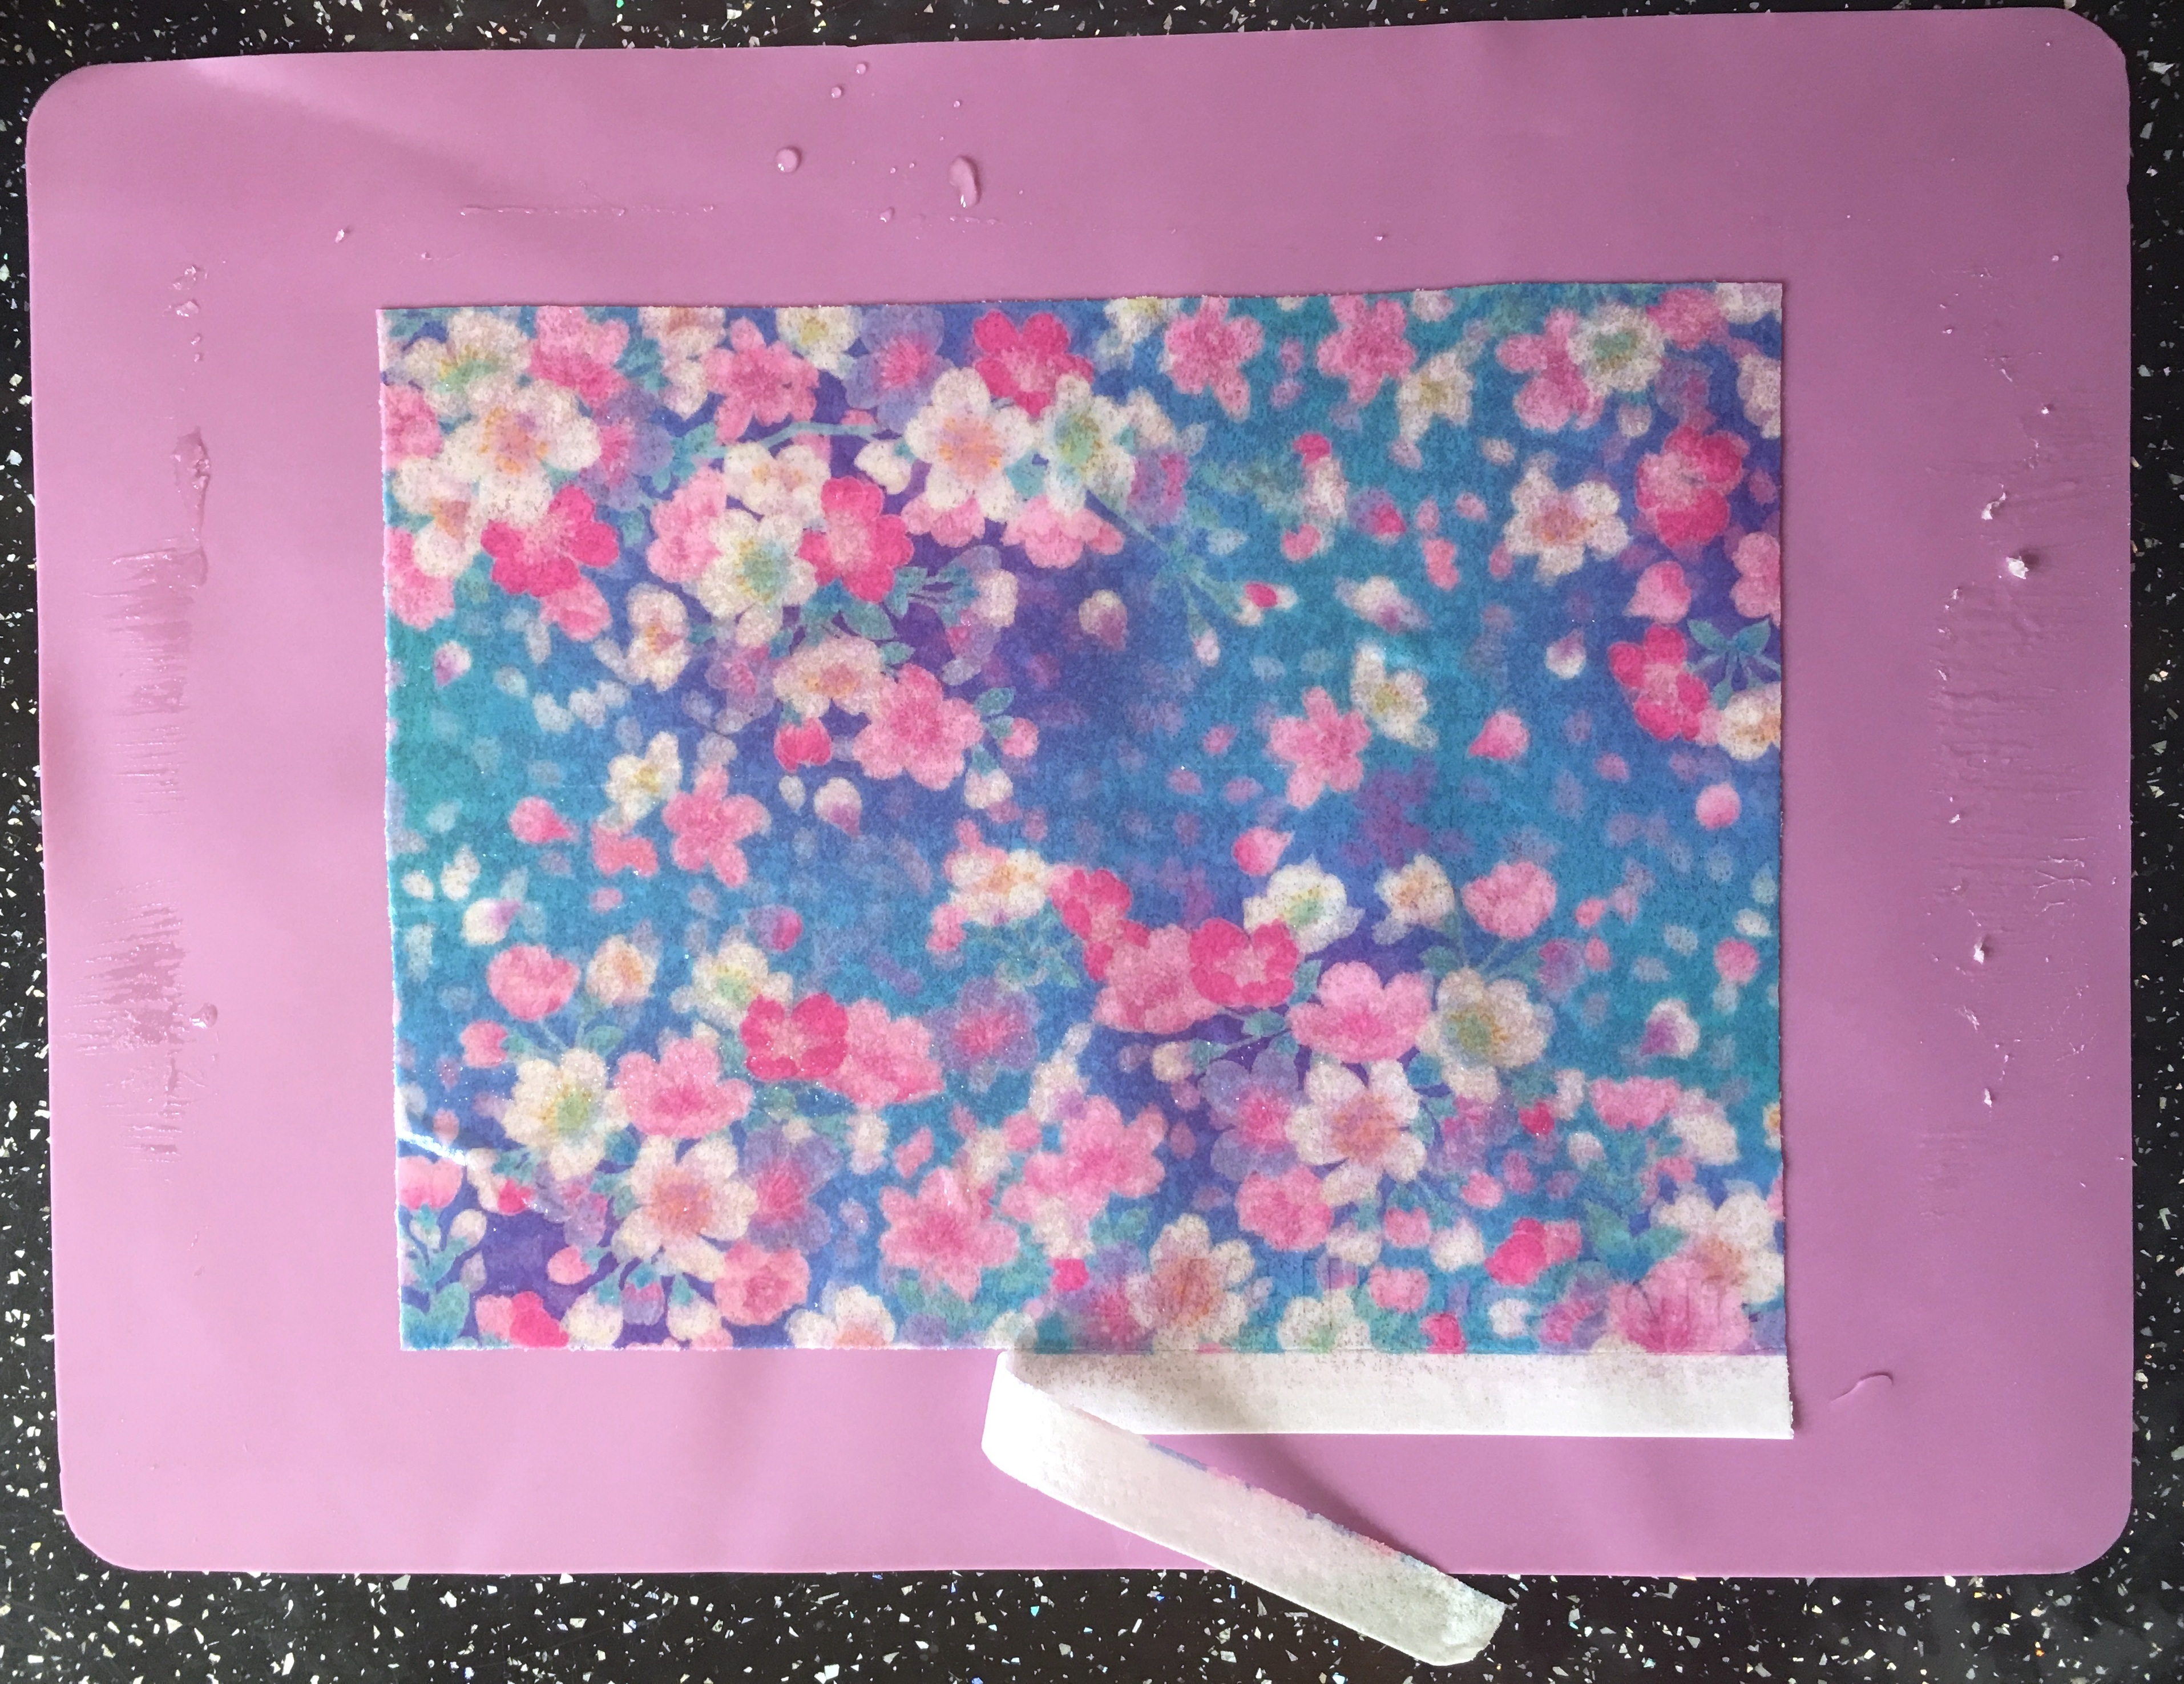
You will need a silicone mat slightly larger than the wafer so it fits with a bit of space around the edge. You are going to be painting a hot, wet mixture over both sides of the wafer.If you don’t have a large mat you can cut the wafer in half first. When you have painted one side of the wafer it is very delicate, so rather than trying to turn it over it’s much easier to place another mat on top and flip it.
Heatproof Container
Any sort of heatproof pot or bowl should do, so long as it’s suitable for the microwave. When using leaf gelatine a shallow bowl is better as you need to cover the leaves with water. A jam jar, glass dish or microwave bowl are also suitable. Something with a lid is handy for storing any leftover mixture. If you don’t have a microwave then you’ll need a bowl that fits over a saucepan to heat on the hob.
Measuring Spoons
All you need is a tablespoon! The recipes we have provided use pre-packaged, measured ingredients so there’s no messing about. You only need to measure out the water in tablespoons.
Microwave or Melting Pot
Microwaving is the simplest solution. If you don’t have one then you need some kind of double-boiler arrangement. Anything that keeps the mixture separate from simmering water. You could put a bowl over a pan of water on the hob or place your container into a bowl of very hot water. Or maybe you have a bain-marie or water bath. The way to dissolve gelatine is similar to melting chocolate but you need a higher temperature. Anything designed specifically for melting chocolate probably won’t work.
Brushes
A normal paint brush is fine for painting on the mixture, or you can use a flat pastry brush. We tried both and they are each about one to one and a half inches wide. You can of course use a wider or narrower brush depending on the size of the fabric you are making.
A soft brush is essential for brushing off the cornflour or powder if you are aiming for edible fabric with a matt finish. Paint brushes or a pastry brush should be fine for this, or you could try a blusher/bronzer brush. Make sure it’s either new and unused, or thoroughly washed first so it's food-safe.
Pizza Cutter
A small pizza cutter works well for trimming the fabric even while it’s still tacky. You can use a sharp kitchen knife or a craft knive, but be careful not to cut into your mat.
Teaspoons
Keep a few clean teaspoons handy for stirring the mixture. It dries very quickly and sticks to the spoon, so don’t use the same spoon again or you could get dry bits in your mixture. We suggest plastic spoons so you can leave one in the jar when microwaving then throw it away at the end. We also discovered that if you overheat the mixture the plastic spoon melts, so it’s a good indicator!
Dusting for a matt finish
You can use a tea strainer or small sieve to dust on cornflour or edible powder. Just tap the sides while you hold it over your tacky fabric. A flour sifter or dredger may also be suitable. If it’s not fine enough you can stretch a piece cut off a pop sock over the top to make it finer. Alternatively you can make a “puffer” with the toe end of a pop sock of pair of tights. You could even try a pepper pot. We made our own dredger using a mini jam jar, the single portion size you get in cafes. We stretched a piece of pop sock over the top and secured it underneath. This works well as you can put the lid back on when not using it.
How to make Edible Fabric
Below you will find three recipes. Choose either recipe 1 or recipe 2 to create your mixture. The final recipe then describes how to use that mixture to turn wafer paper into an edible fabric:
Mixture 1 using leaf gelatine
Mixture 2 using gelatine powder
Recipe 3 using your mixture
Edible Fabric Recipe 1 (Leaf Gelatine Mixture)
Leaf Gelatine costs a little more than powder and is a bit more fiddly to use, but you get a little more coverage so the cost works out about the same. It also results in a clearer and finer fabric. You can find it in most supermarkets.
Ingredients
Enough for 4 to 5 sheets of A4 Wafer
- Caketoppers wafer sheets printed with your design
- 1 packet of Dr Oetker Platinum Grade Leaf Gelatine (13g, 8 leaves)
- 5 tablespoons (75 ml) of cold water
- 1 small bottle (38 ml) of glycerine
- (Optional) Cornflour or cake decorator’s edible dust
This recipe is only for platinum grade gelatine leaves. If you use a different brand or grade the results may not be the same as they have different strengths. Platinum is the highest available. If you are using a lower grade you may need to use more sheets for a good quality edible fabric.
Make up the mixture
1. Cut the gelatine sheets into small pieces into a heatproof bowl.
2. Cover with the water. The pieces should be small enough so that they are all submerged in the water.
3. Leave to soak for 5 minutes.
4. Turn the gelatine leaves over in the water and leave to soak for a further 5 minutes.
(Make sure all the pieces are soft, otherwise give them a stir and soak for a few more minutes.)
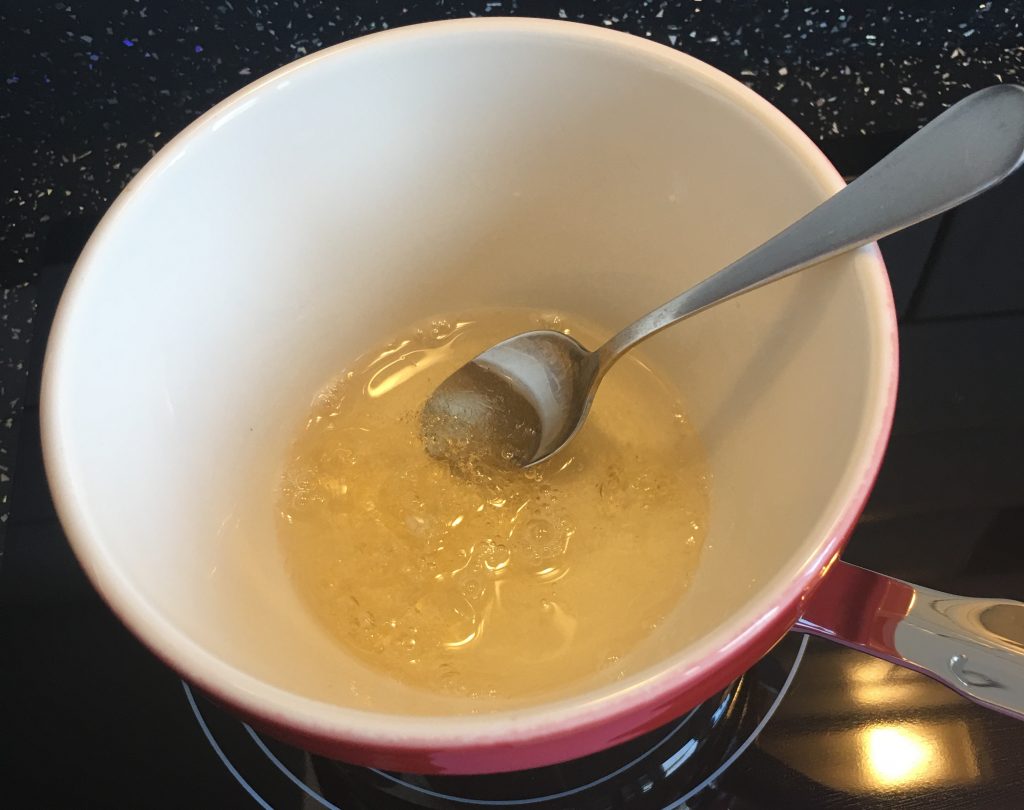
5. Microwave in 10 or 15 second bursts stirring after each time until the gelatine is completely dissolved.
6. Do this 2 to 4 times depending on the power of your microwave. DO NOT LET IT BOIL.
7. Stir in the whole bottle of glycerine and mix well.
8. Microwave again for 10 or 15 seconds. It should be very runny and quite hot.
It is now ready to use but will start to go to jelly as it cools. If that happens you can microwave it again in 10 or 15 second bursts to keep it fluid.
Tips on Using Leaf Gelatine
To melt gelatine leaves we suggest a microwave. You can also use bowl over a pan of gently simmering water on a hob, or other suitable equipment such as double boiler, bain marie or water bath.
Keep your mixture on a very low heat while you are using it to keep it fluid. If that’s not possible, just return it to the heat if it starts to thicken up and go to jelly.
DO NOT LET THE MIXTURE BOIL! Not only might it spill over your bowl but it can also spoil the setting properties of the gelatine.
Edible Fabric Recipe 2 (Powder Gelatine Mixture)
These are the cheapest ingredients and the most simple method of making the mixture to create edible fabric. The Dr Oetker gelatine (pack of 3 sachets), glycerine (38ml bottle) and a packet of cornflour are available in most supermarkets for around £1 each.
The result is a slightly opaque mixture with a yellow tinge. This will be barely visible if you are using it with a busy print on the wafer.
Ingredients
Enough for 4 to 5 sheets of A4 Wafer
- Caketoppers wafer sheets printed with your design
- 2 sachets of Dr Oetker 12g gelatine (24g total)
- 5 tablespoons (75 ml) of cold water
- 1 small bottle (38 ml) of glycerine
- (Optional) Cornflour for dusting
This recipe has been created for Dr Oetker powder gelatine sachets. If you use a different gelatine powder the results may not be the same. Powdered gelatine is available in different strengths, referred to as “bloom”. If you are using a stronger bloom you should use less powder, or you need more powder for a weaker bloom. You may also need to soak the powder in cold water after step 3 for about 10 minutes. This is because some powders need time to absorb the water before heating. We suggest you read the instructions on the packaging. This is not necessary with the Dr Oetker powder to get the best results for your edible fabric.
Make up the mixture
1. Put the water into a microwavable container.
2. Gently sprinkle on the gelatine, stirring all the time.
3. Keep stirring until it’s well mixed.
4. Microwave in 10 or 15 second bursts stirring after each time until it’s completely dissolved.
5. You’ll need to do this 3 or 4 times depending on the power of your microwave. DO NOT LET IT BOIL.
6. Stir in the glycerine and mix well.
7. Microwave again for 10 or 15 seconds. It should be very runny and quite hot.
It is now ready to use but will start to go to jelly as it cools. If that happens you can microwave it again in 15 second bursts to keep it fluid.
How to make the Fabric from your Recipe Mixture
First make up your mixture using either of the recipes above. The following instructions are the same whichever you use.
Your Caketoppers wafer has an un-printed border – leave it there for now, you can trim it off after you’ve made your fabric.
You will need:
- Edible Fabric Mix as made up from one of the recipes above:
- Recipe 1 with leaf gelatine, or
- Recipe 2 with gelatine powder
- Printed wafer sheets
How to make the Edible Fabric
- Make up the mixture using one of the recipes above
- Let the mixture cool down a little so it isn’t scalding hot. It should be just warm and runny.
- If it has cooled down completely re-heat it using the same method you used to melt it.
- Put the wafer printed side down on one silicone mat.
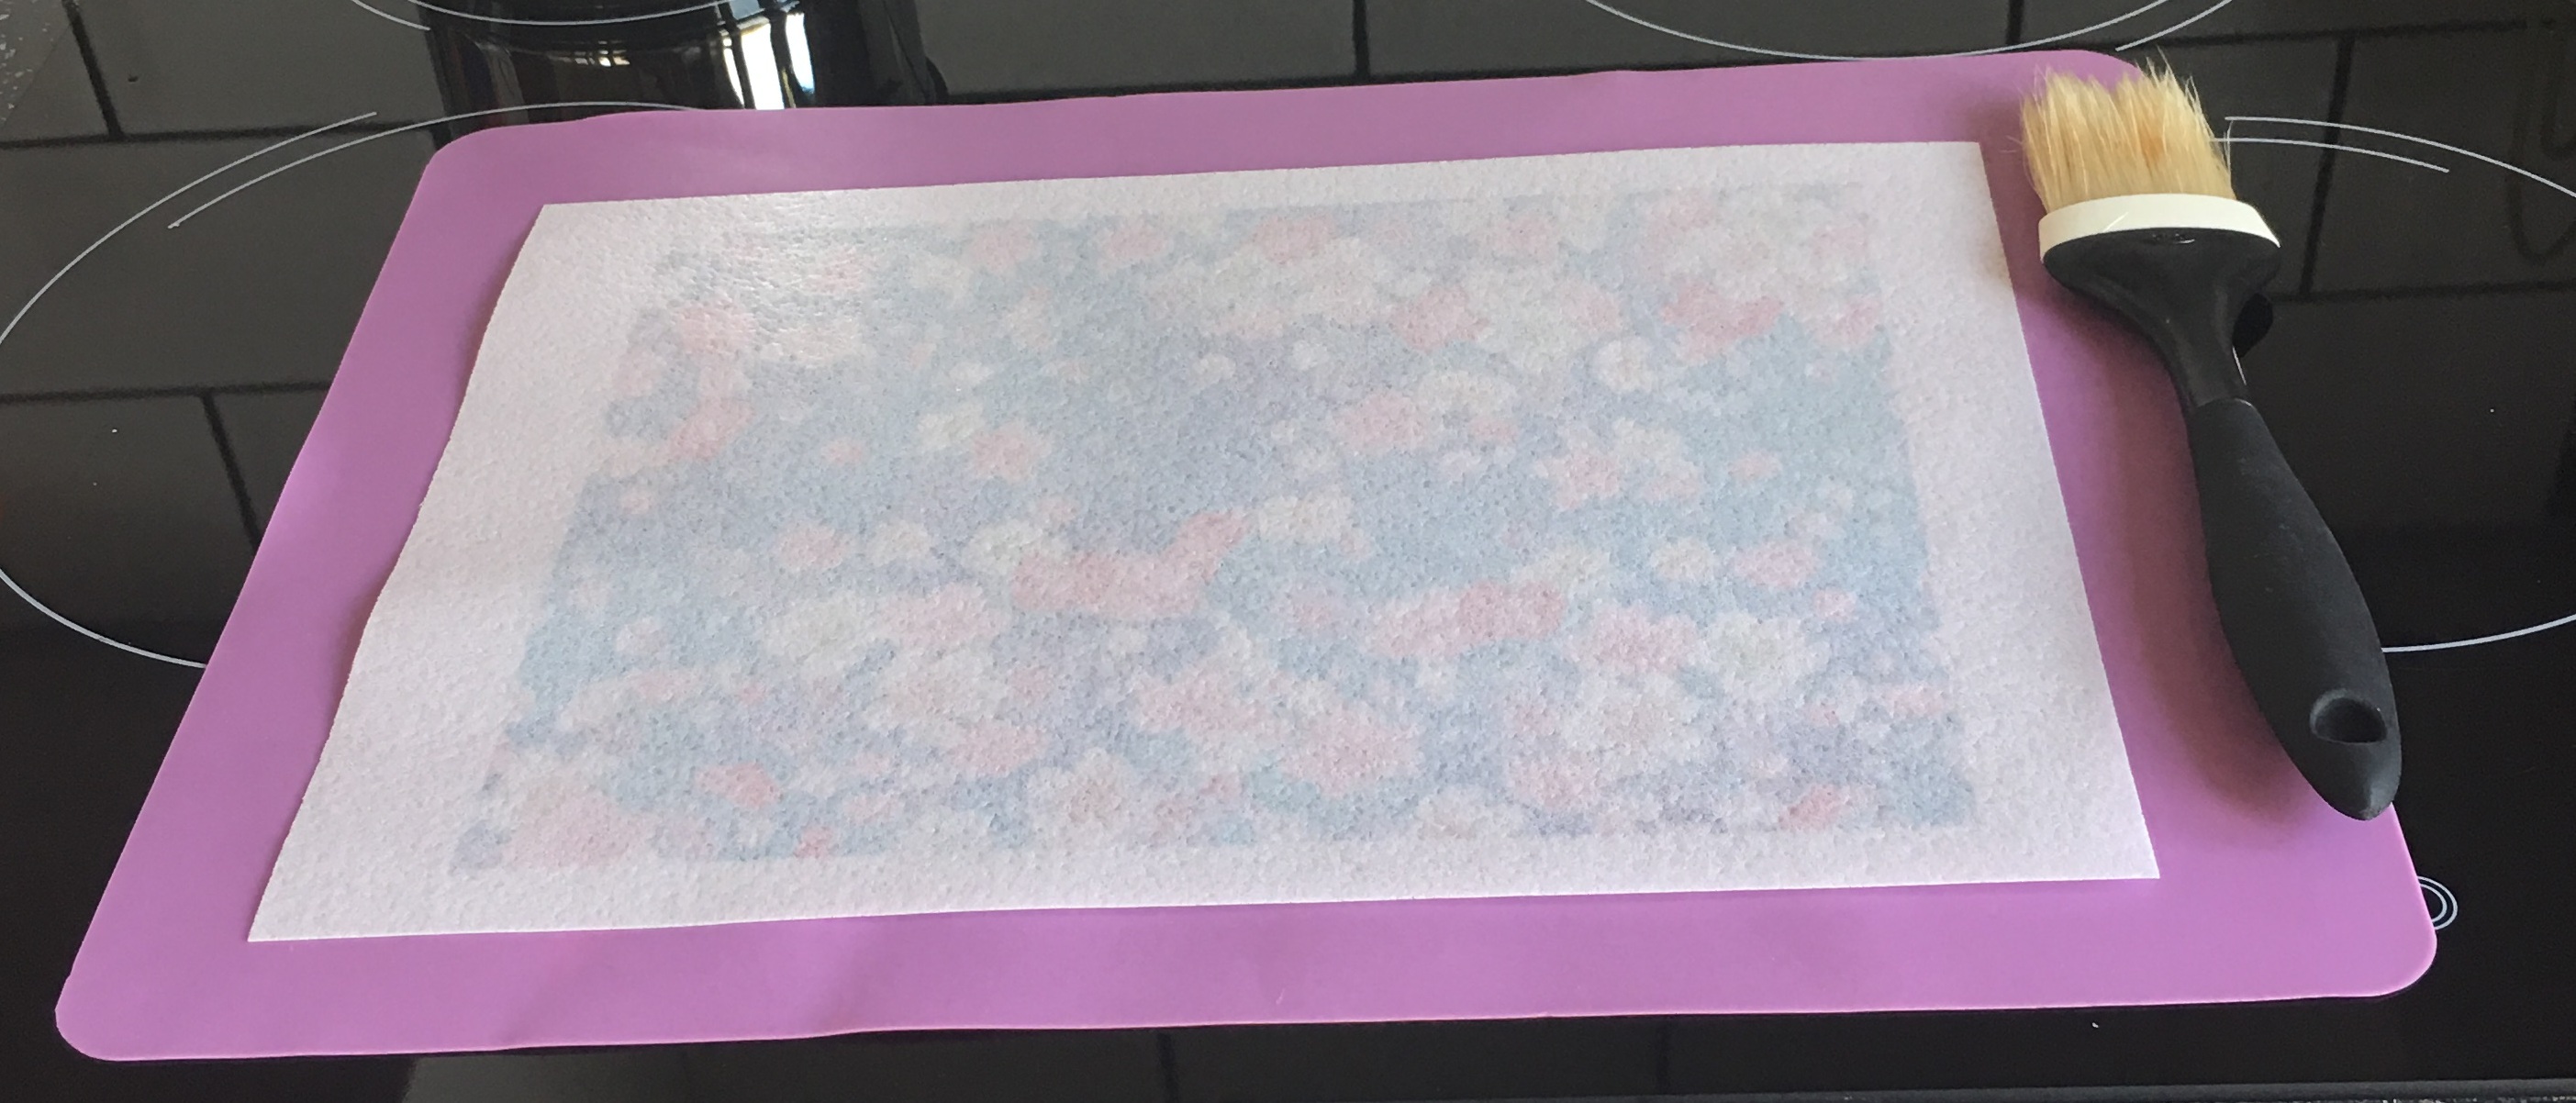
- Paint the mixture over the back of the wafer using light, smooth brush strokes.
- You can either paint over the entire sheet, or leave some of the border dry to make it easier to handle.
- Immediately and carefully place another silicone mat over the top
- Flip the whole thing over then peel away the first mat, leaving your wafer print side up on the second mat.
- If you don’t have a second mat, carefully turn the wafer over holding the unprinted edge. Try not to let it wrinkle.
- Now paint the printed side.
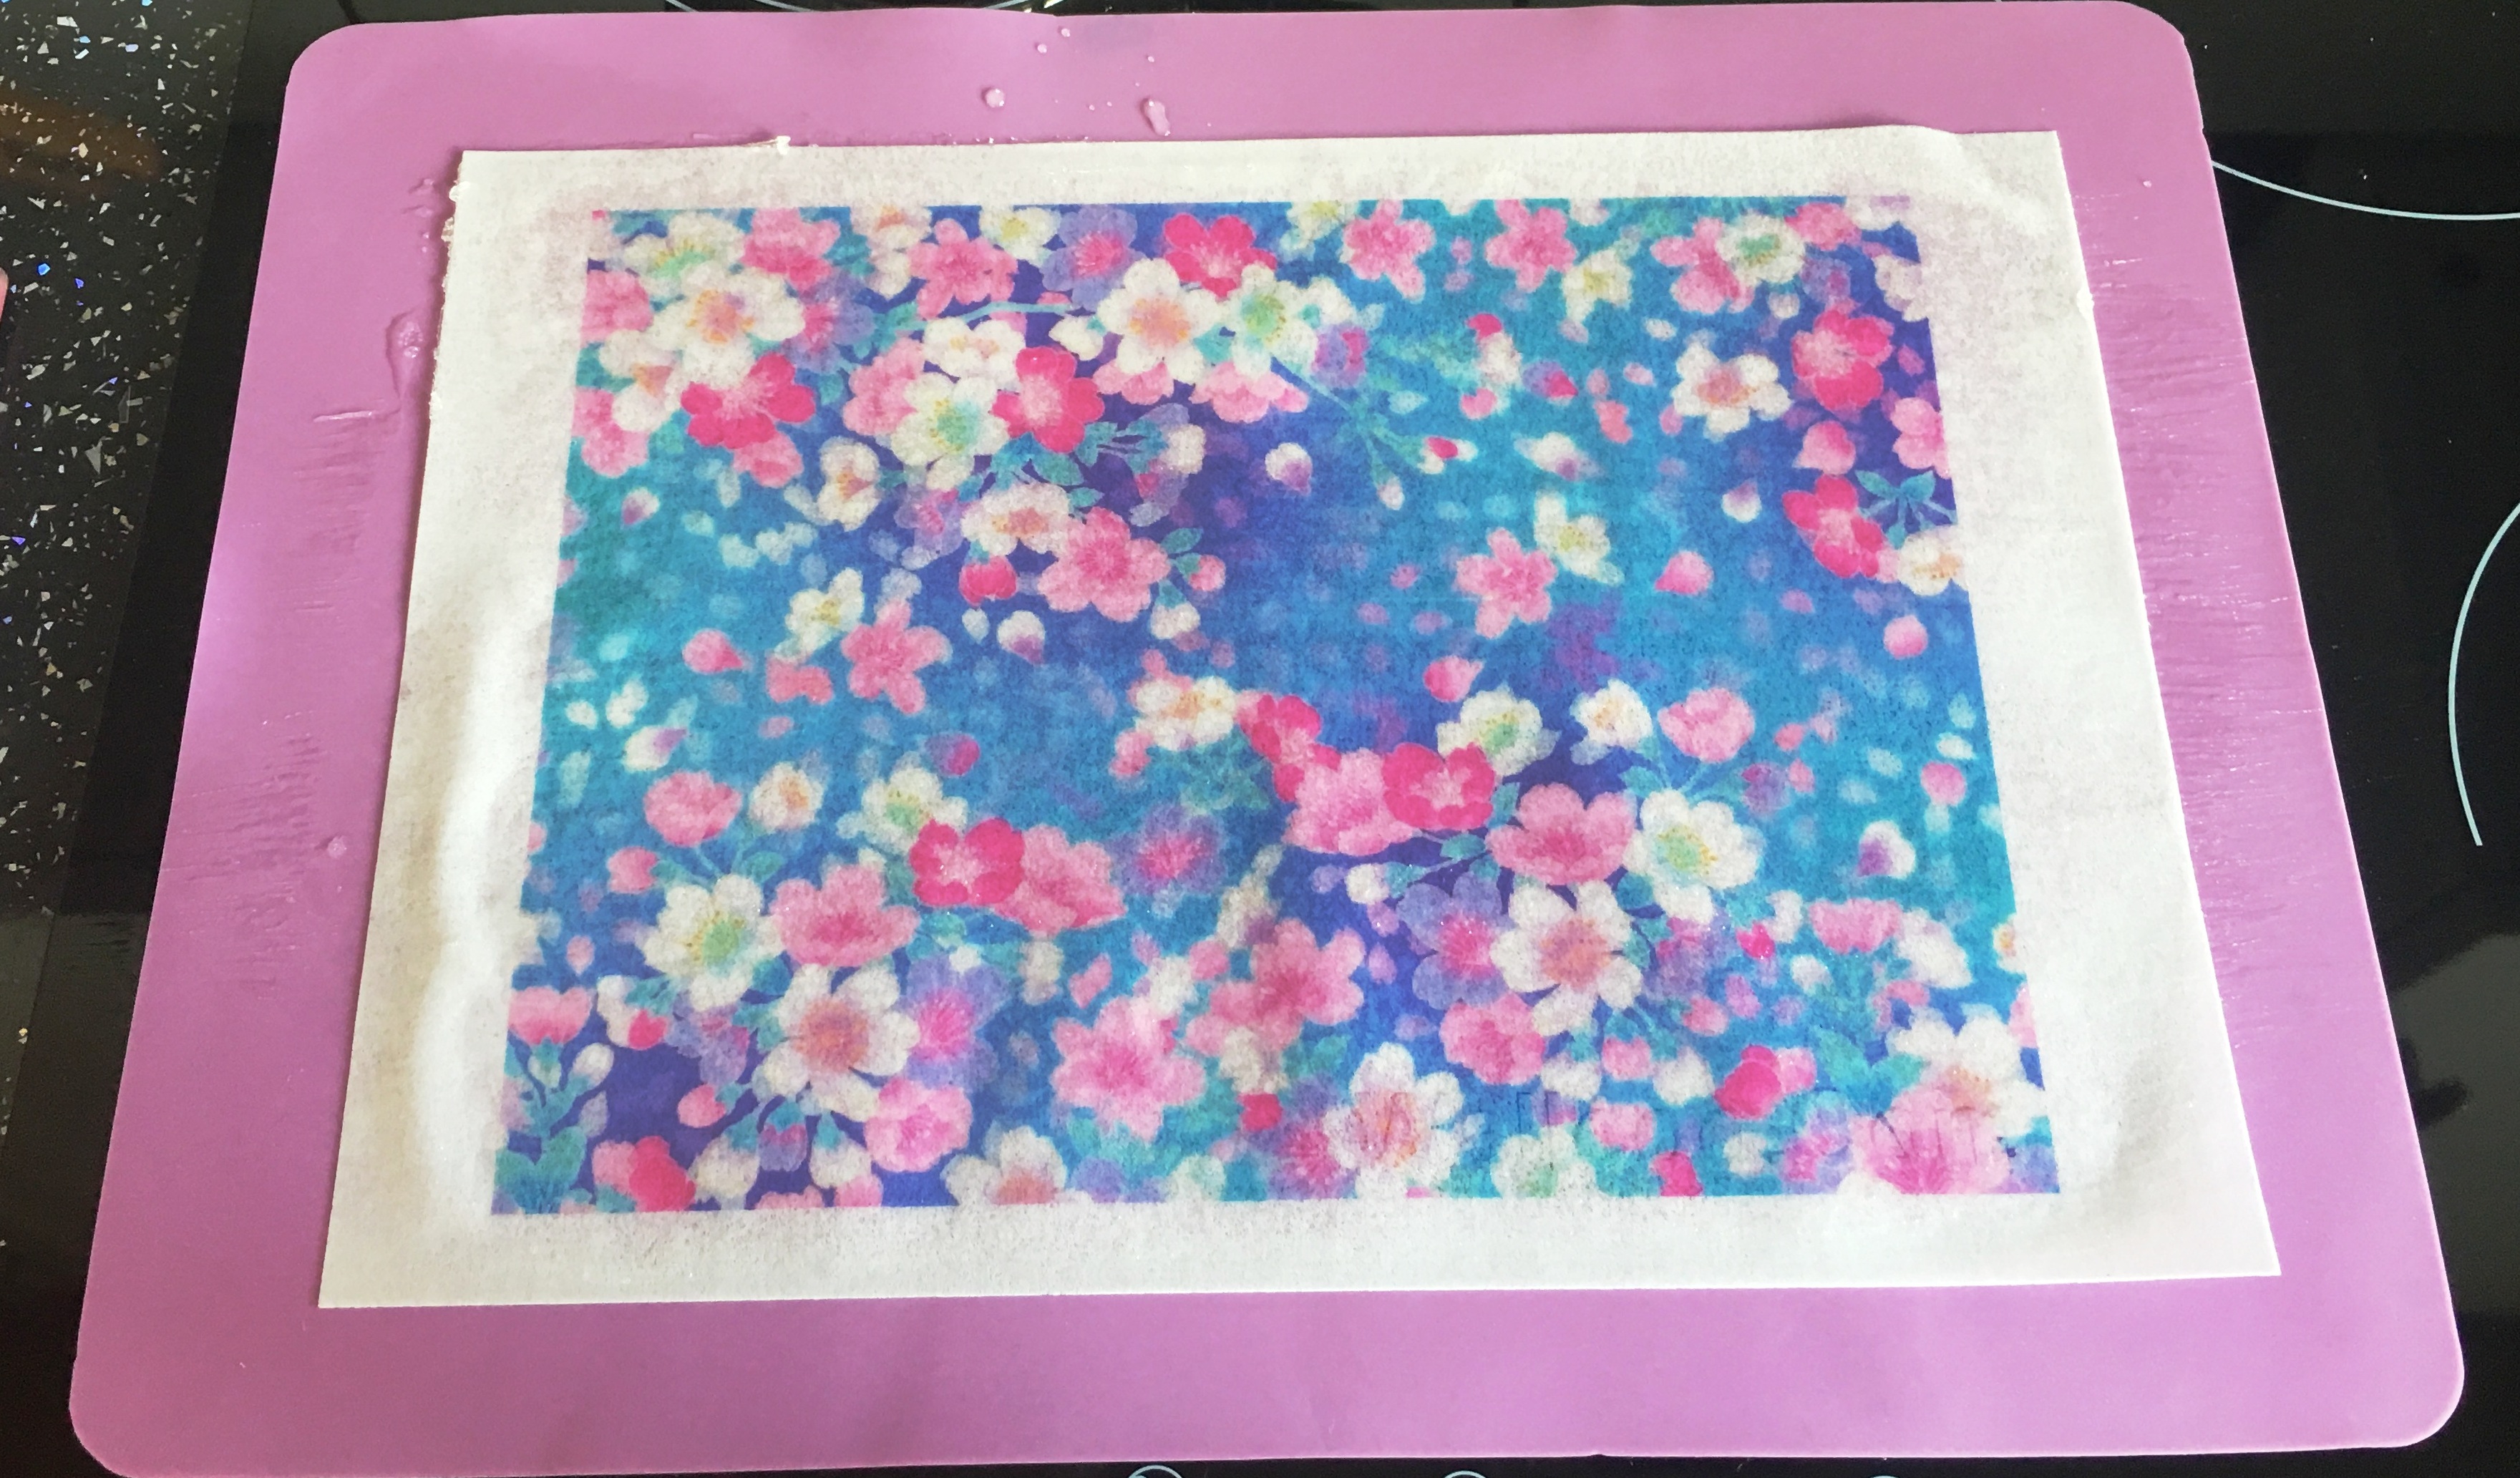
- Gently test the edge of your edible fabric with your finger. It will feel tacky but your finger should come away clean.
- If you are going to dust your fabric you can do that now. See below for more information.
- If you are not dusting it then leave it to set for about an hour. If you handle it too much before it sets completely it can stick to itself and is quite delicate.
- Use a pizza cutter or knife to trim away the un-printed border. Be careful not to cut into your mat, or transfer the fabric to a cutting board first.
Tips
- Get everything ready before you begin, put your wafer on the mat and keep your paintbrush handy.
- Working will smaller pieces is much easier. So if you don’t need to use it full size then cut the wafer in half or quarters before painting.
- You can make up the mixture in advance. Let it cool and store covered in the fridge or freezer until you are ready to use it. It should keep for about a week in the fridge, or 3 months in a freezer. Check for any signs of mould before you use it.
Finishing Touches
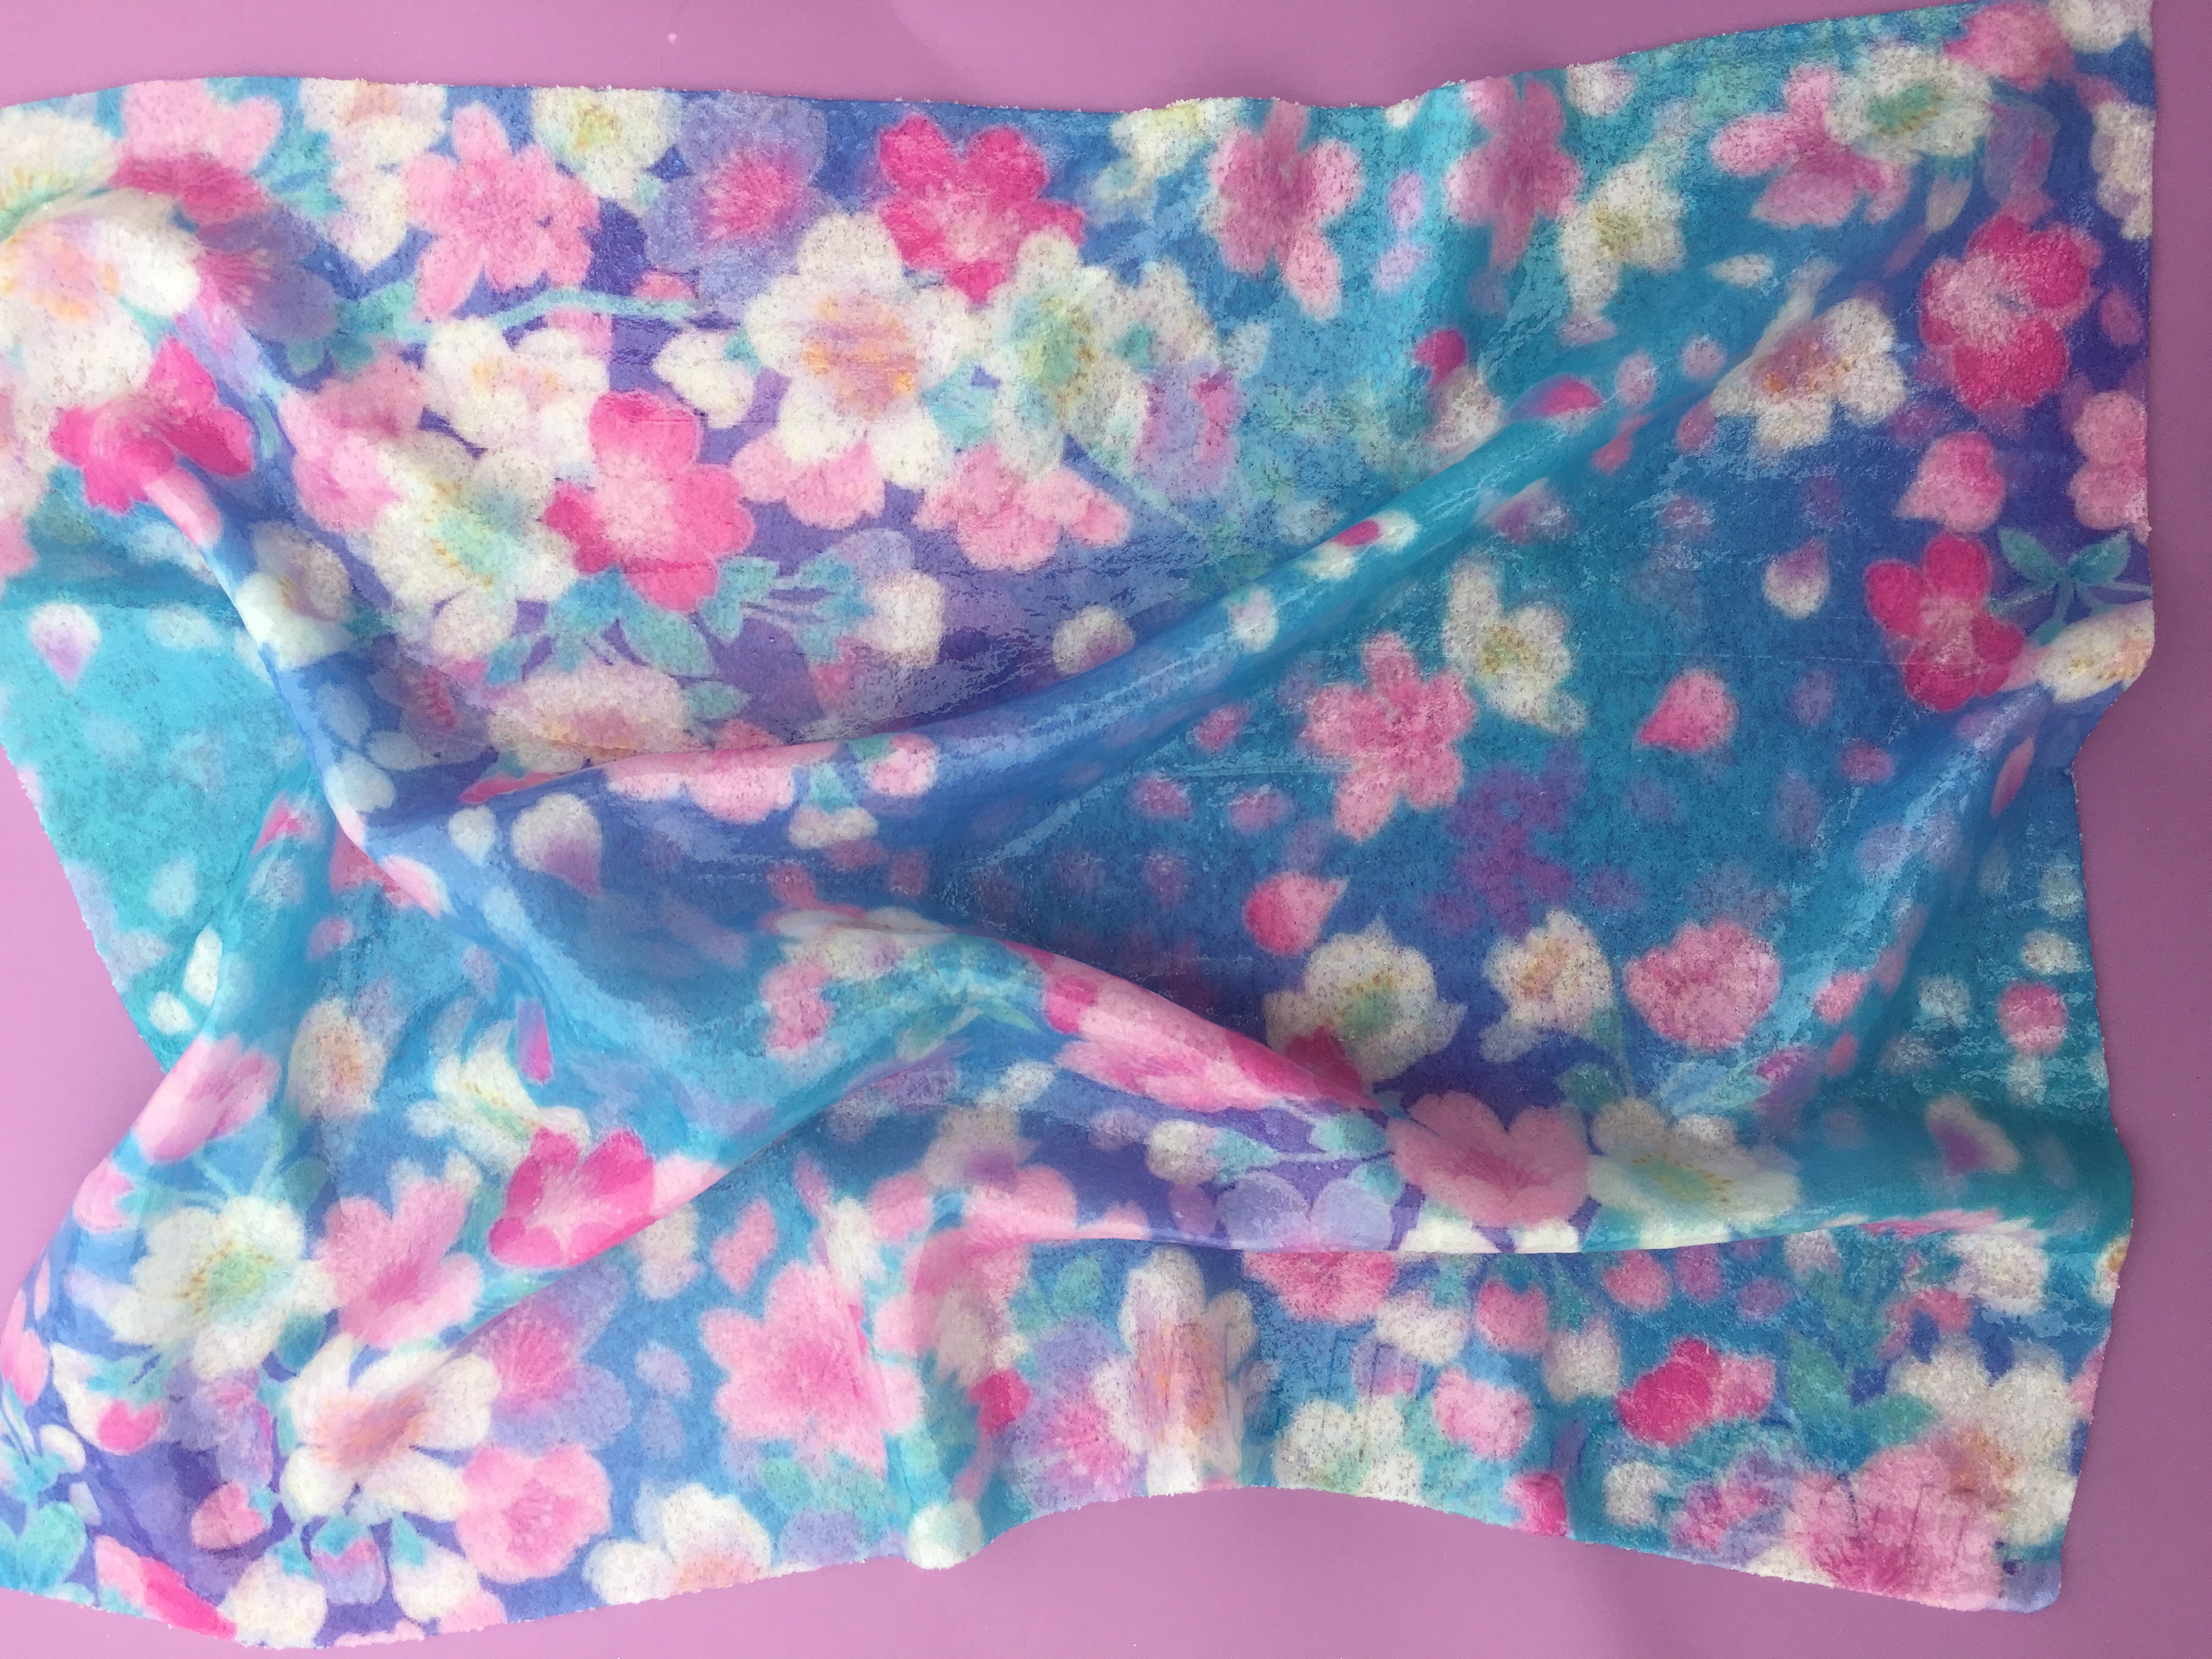
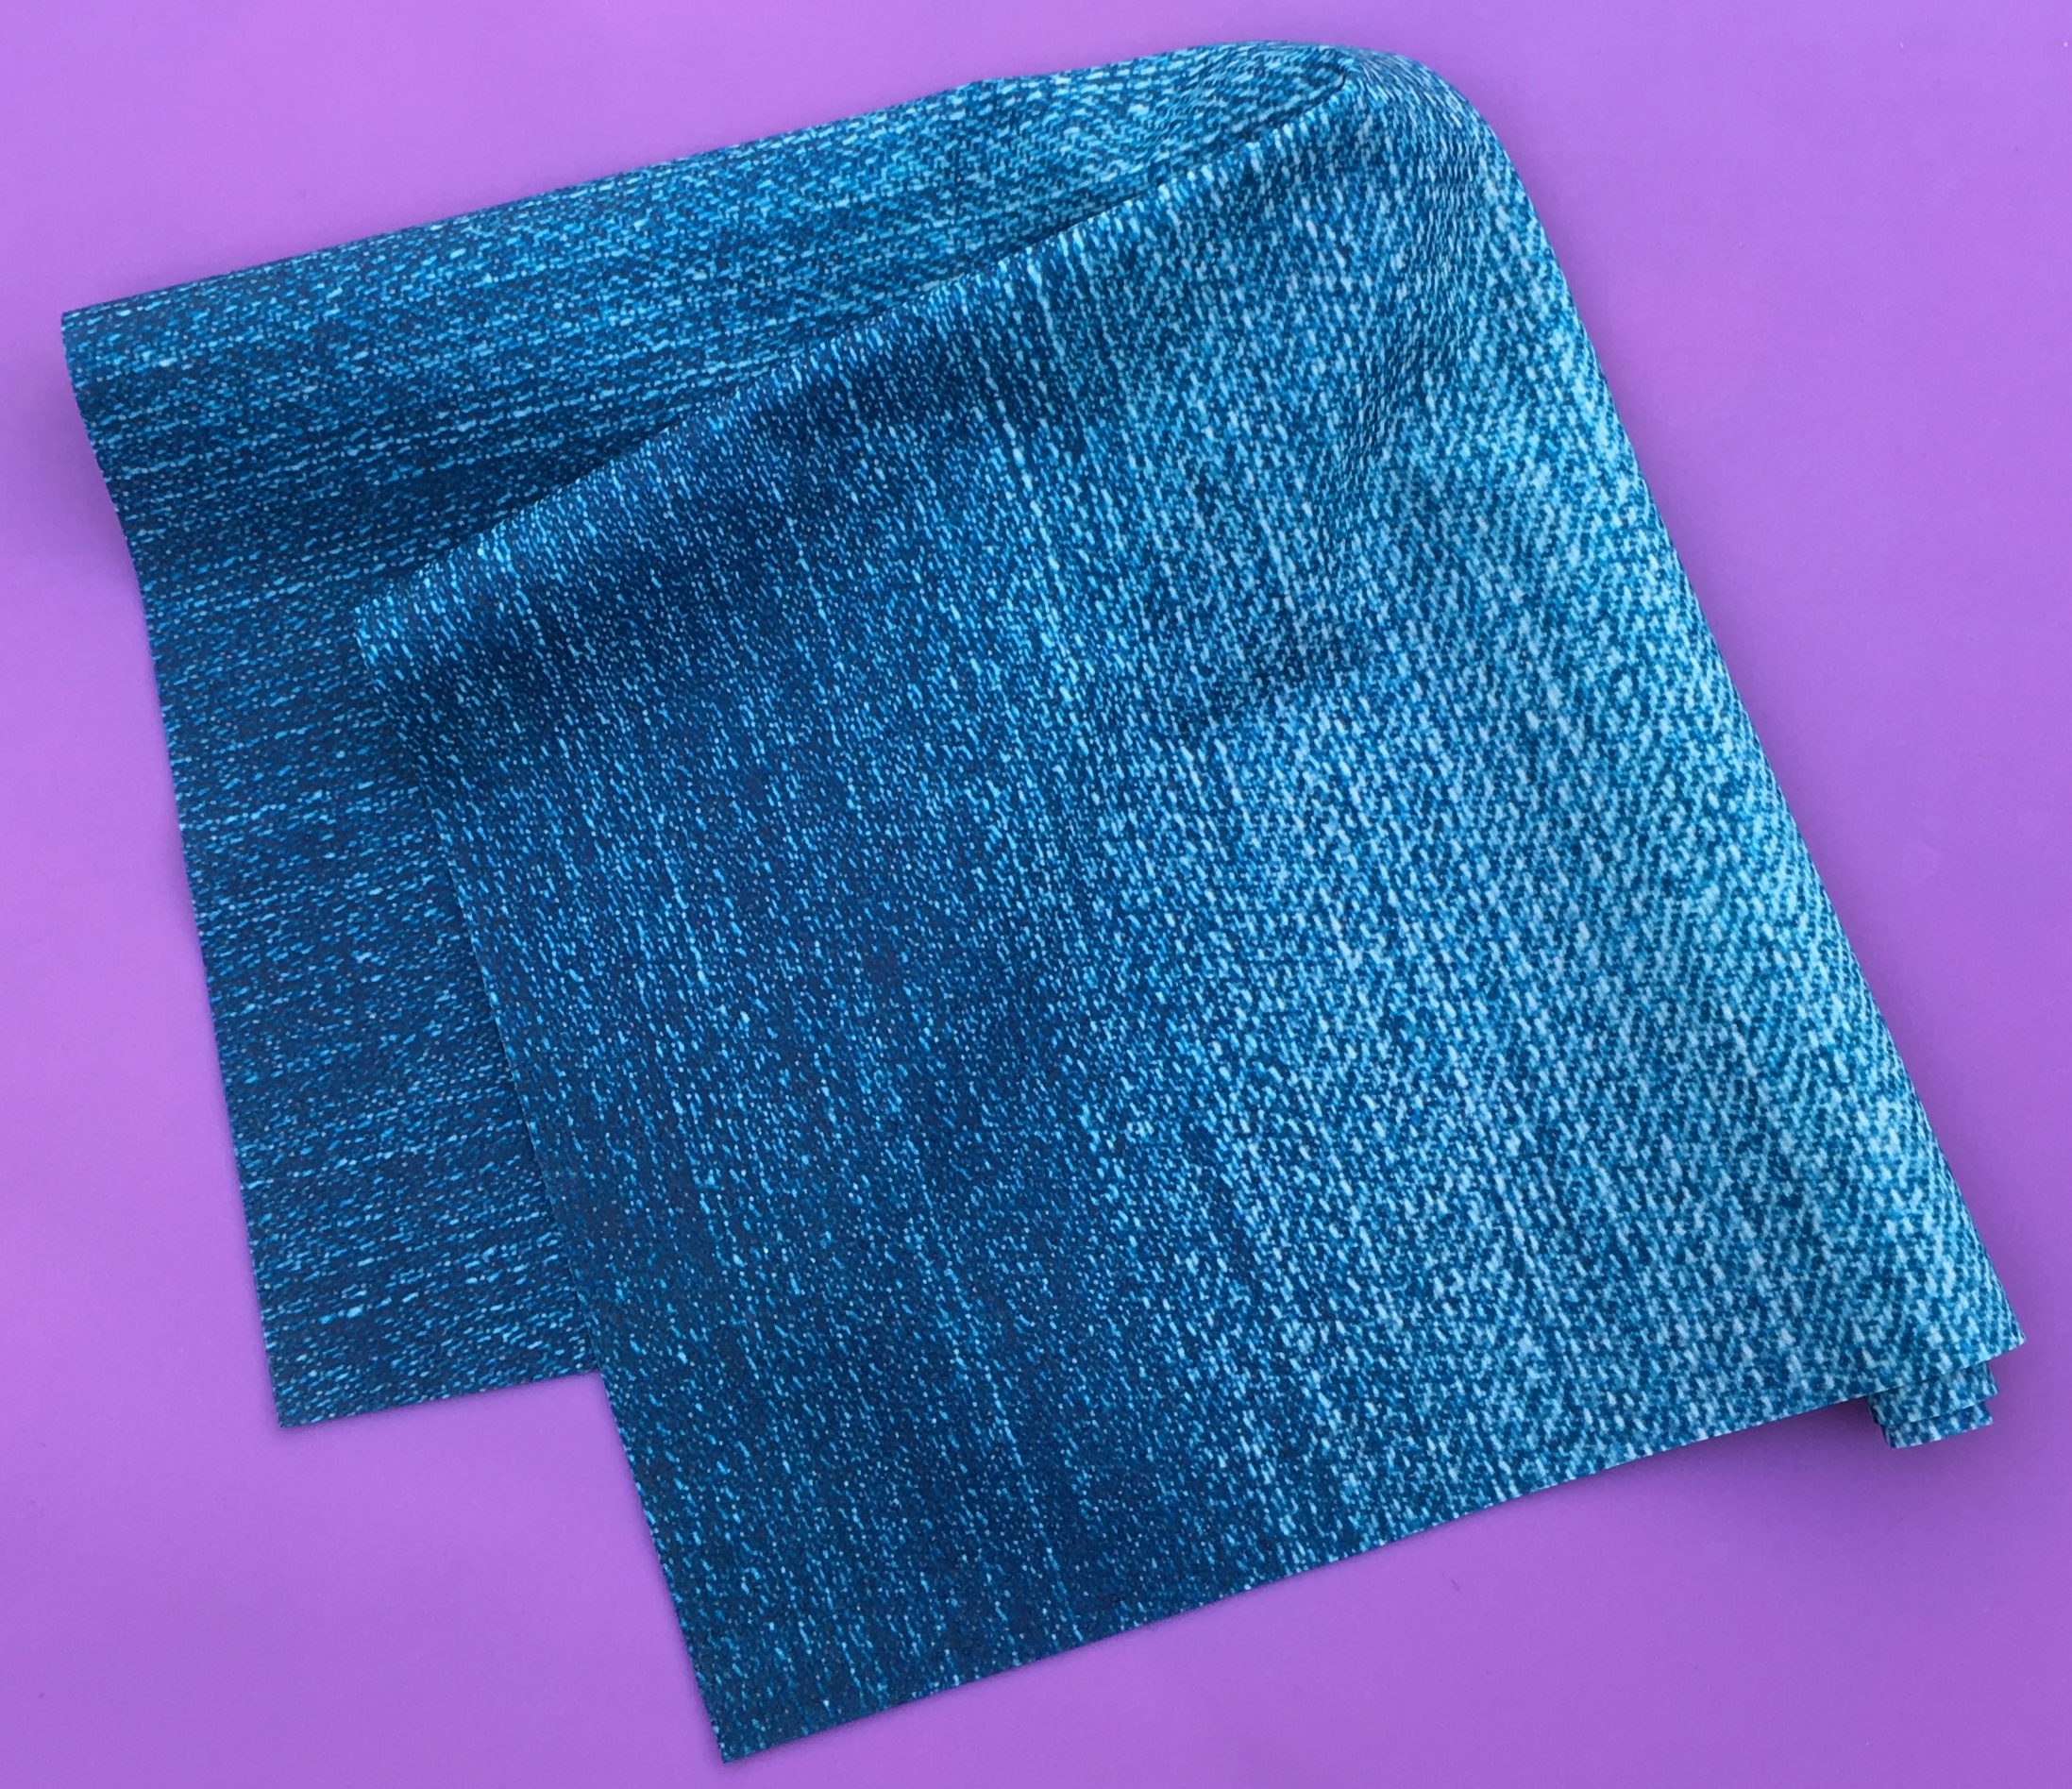
The finished result is a shiny material with the look and feel of silk that will stay tacky for weeks.
If you want a dry or matt finish you can dust with cornflour or an edible dusting powder.
Cornflour is white so it will make the print a little whiter.
If you use a coloured edible dust or lustre, that may change the colour of the edible fabric, depending on how much you use.
Apply just enough powder so the material is no longer tacky. You can then keep adding more to get the results you want.
You can dust just one side of the print or both, and you could dust each side with something different. Edible lustre tends to come off when in contact with skin so you could lustre the printed side and cornflour the back side.
Also note: cornflour contains a protein that can interact with fondant or sugarpaste if left in contact for some time. So if you are using your fabric on an iced cake that might be sitting around for more than a day or so then you can either use an edible dust instead, or put the cornflour only on the outside surface. This leaves the back side tacky which may help with sticking the fabric to your cake icing. Alternatively, create a barrier with piping gel, shortening (white baking fat) or an edible glaze.
How to Dust the Edible Fabric:
1. Gently tap your dredger over the fabric to apply a fine sprinkle of powder.
2. Gently work it into the fabric with a soft, dry brush.
3. Turn it over and do the other side.
4. Brush off any excess powder
5. Leave to set for about an hour.
Tips:
Store your dusted and dried fabric in a plastic bag or air tight container so it doesn’t dry out.
Once you have dusted the fabric it will start to dry out. If you are making it in advance we suggest you leave the dusting until just before you are going to use it .
Before dusting you could put your mat in a baking tray to help contain any mess. When brushing the dust off you can do this over a sink.
A Perfect Finish
Don’t expect absolutely perfect results, it’s quite likely there will be some brush marks or bubbles. The nature of the wafer paper means the print could be patchy or streaky before you begin. Most of these are barely visible in a busy print and the amazing fabric you end up with makes up for any minor flaws.
A few things you can try to get a better finish:
- If you don’t need to use your edible fabric full size then cut the wafer in half or quarters before you paint on the mixture. It’s much easier on smaller pieces.
- Get everything ready before you begin, put the your wafer on the mat and have your paintbrush handy so the mixture doesn’t cool down too much before you start painting.
- If you have a dark or dense print, test a small part of one edge first. If the colours smudge then let the mixture cool a little and try not to press down with your brush.
- Make sure the mixture doesn’t start to set. Keep your pot over a bowl of hot water or re-microwave to keep it fluid.
- Load up your brush generously, you don’t want to go over the same area too much or it could leave drag marks, but don’t let it drip on to your wafer!
- If the brush feels like it’s dragging you need to warm up the mixture.
- The wafer has an un-printed margin so you can leave one edge unpainted. You can use it to hold onto and make it easier to handle.
- For larger pieces brush from the centre of the wafer towards the outside to avoid it pooling at the edges.
If using powder gelatine:
- The mixture has a yellow tinge to it and will turn the wafer slightly yellow. You can reduce this with a little more water or a little more glycerine, but this makes the fabric more delicate to handle and can cause the colours to run if you have a dense print.
- After you microwave the gelatine and before you add the glycerine, leave it to cool for 5 or 10 mins and you may see a layer of frothy foam on top. You can scrape off this foam (I found a small pallet knife best for this). The result is a very slightly thicker mixture that’s a tiny bit less yellow.
- If you see any undissolved lumps of gelatine after you microwave it you can sieve it to remove the lumps before you add the glycerine. This also removes some of the foam and helps reduce the bubbles.
Next Post >>
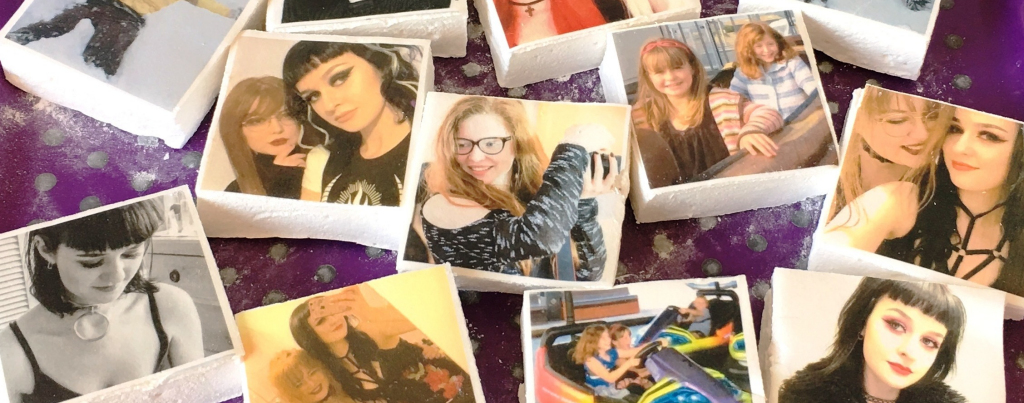
How to make marshmallow with printed photos
Here we show you how to make your own printed marshmallows with photos. You can use our printed edible wafer sheets or icing sheets. You can have any kind of photo – old or new, colour, black & white or sepia ...
